
This page documents my experience of running Linux on a Linksys NSLU2 – popularly known as a slug. I may update the page from time to time as my usage of the slug changes.
Before starting to upgrade the slug, I spent some time playing with the box as shipped. I also invested some time in reading the excellent NSLU2-Linux development group website documentation. The FAQ and HowTo sections of that site in particular are invaluable. The investment was well worth the effort because it meant I could avoid some of the known gotchas. I recommend that anyone else wishing to reflash a slug do likewise.
All configuration of the standard NSLU2 is done through a web interface. The default address is 192.168.1.77 so the first change I made was to the network configuration to match my local preferred standard.
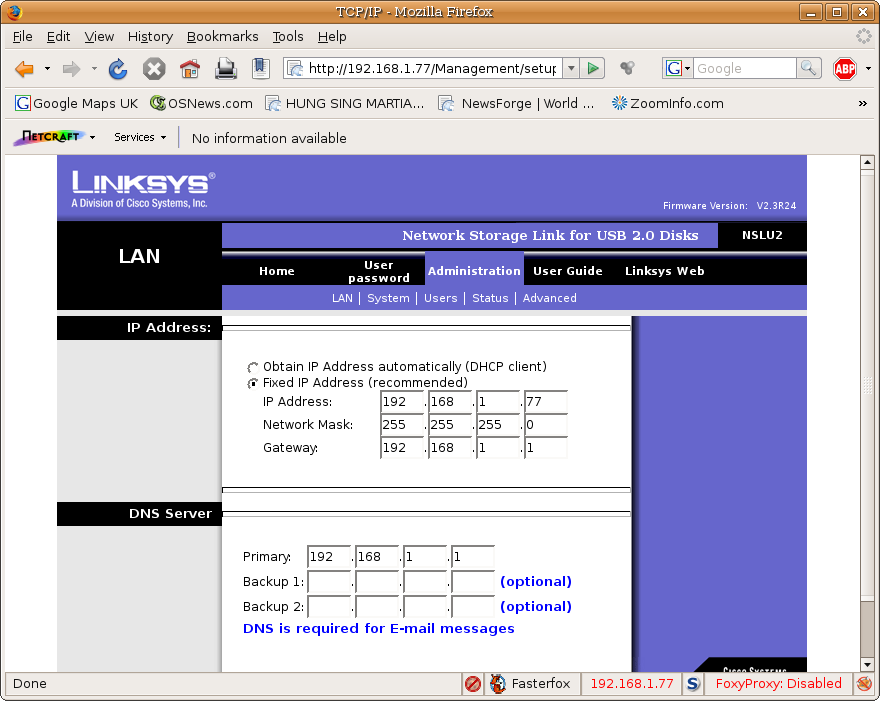
I stuck to static addressing (for obvious reasons) and plugged in the addresses of my default gateway and DNS servers. These configuration details are needed during the reflash process. In particular, a debian install will not work unless the complete details of how to reach the outside world via your default gateway are available to the install program.
There are a number of upgrade options available ranging from minor variants of the Linksys firmware right through to complete Debian installs. I initially plumped for installing SlugOS/LE as potentially offering the best compromise of wide range of software whilst being specifically targetted at embedded devices. A complete Debian install seemed a little OTT because that OS is aimed at larger servers and desktops. However, I later changed my mind. For anyone unsure about which distribution is best for them, Rod Whitby has some advice on each of the five supported distros.
The SlugOS installation was quite straightforward. After downloading the binary from slug-firmware.net and following the Wiki instructions I had a working installation in no more than an hour. The notes on initialising SlugOS give instructions on disk partitioning, but I skipped most of this because I had already partitioned my disk before starting (one of the advantages of reading all the instructions first is that I could prepare the disk, including a nice large swap partition). Once installation was complete, I started to download packages I wanted. This is where I eventually decided to change to a Debian install.
SlugOS is sufficiently different to a standard Debian install to be mildly confusing (OK, so I shouldn’t complain, after all I have in the past managed heterogeneous networks of various flavours of Solaris/SunOS and Linux, with the odd MS client thrown in. But I’m getting old and forgetful and I like to know that all the configuration files I need are in the same place). The package management software (ipkg) is remarkably close to dpkg, but it currently has a rather limited repository – in particular it seemed to miss some packages I wanted such as Apache and PHP. (Take a look at the ipkg repository search.) Whilst it turned out to be possible to download those packages from the Optware repository, doing so caused some conflicts. For example, the Optware packages often attempted to solve apparent dependecy problems by installing their own versions of packages to /opt. This could result in some wierd clashes such as “less” appearing in both /usr/bin and /opt/bin.
At this stage I had lost nothing more than some time and had gained some experience of flashing the slug so I decided to change tack and try a full Debian install. Doing so would give me access to the whole Debian ARM repository (approximately 18,000 packages) and the use of apt-get management. It turned out to be remarkably easy, and very satisfying too. Again there are complete, well documented and thorough instructions on-line. Martin Michlmayr is to be congratulated on a job well done.
The initial install process is the same as for SlugOS. You need a binary install image and upslug. In this case though, you have a choice of two separate firmware images. The NSLU2 ethernet drivers require some proprietary code which cannot be shipped with official Debian images. Using the Debian official images forces you to use an external USB ethernet adapter and also forces you to swap the ethernet connection around during install. Using an unofficial image containing proprietary microcode allows you to use the existing ethernet RJ45 connection. I copped out and chose the easy route. Because I had already reflashed the slug once, I no longer had the Linksys web interface available to me. So I had the put the slug into upgrade mode first before running upslug2 and flashing the new image. Once the image was installed, the slug rebooted automatically. I reconnected my (already partitioned but previously disconnected) disk to port 1 and waited for around 5 minutes as suggested in Martin’s instructions. After that I was able to ssh straight in to the installer and then run a standard Debian install. Note, however, that this would have failed had I not already configured the slug’s network details to include a default route to the outside world.
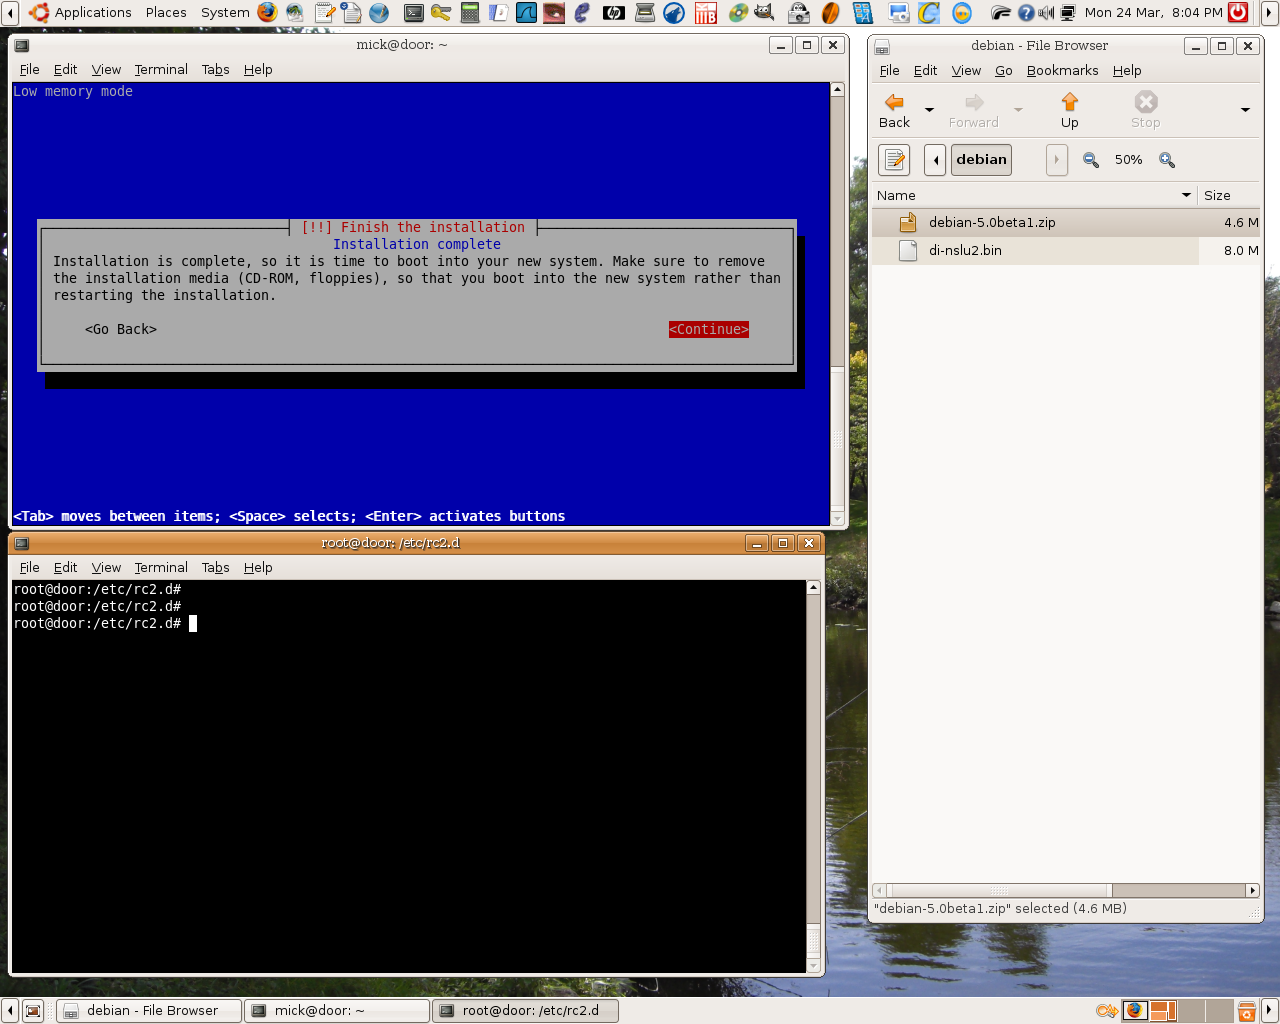
At the start of the installation I opted for “standard system” plus “webserver”, “fileserver” and “SQL database”. On later reflection I realised that I would have been better simply selecting the “standard system” because I ended up removing much of the additional software installed at this stage. The installer program handles all the dependencies for you and all you really have to do is go and have (several) cups of tea while you wait for the installation to finish. Mine took just over 2 and a bit hours, after which I was greeted with the screen below:
The slug may be a flexible little beast, but it is just that – fairly small. After all, 32Mb of RAM is not a lot these days and anything I could do to save memory would be useful. So, after installation I removed some unnecessary services installed as a result of my earlier poor choices about packages. For example, I didn’t want Samba or NFS running so got rid of those along with PostgreSQL and the exim4 mailer. Whilst I may run a mail server in future I don’t want one now, and I prefer postfix anyway. I also took on board Martin Michlmayr’s tips for reducing memory usage. As well as blacklisting IPV6, however, I also blacklisted the soundcore module which stopped all the related snd modules from loading (I can live without beeps…). Incidentally, rather than following Martin’s suggestion of editing /etc/modprobe.d/blacklist I prefer to create my own /etc/modprobe.d/blacklist.local and use that to list local blacklists – it is more obvious that you have made changes that way. So, that left me running apache and ssh (suitably modified to match my local standard – for example I don’t allow root login and I limit access to known users from fixed local addresses) plus NTPD to keep the slug time the same as the rest of my network.
One reason for running the slug was to see whether it would be capable of handling an egroupware installation. I have used this package on more powerful boxes and it would be a really cheap way of offering groupware to a (probably small) community if it proved possible. Well, it is, sort of. Apache alone is pretty quick, even when serving encrypted traffic (I added my own certificate), but adding MySQL and PHP5 pretty much killed the slug. My base installation of egroupware with one user took over 40 seconds to generate each page and the processor and memory usage were maxed out. I’d call that walking rather than running. So reluctantly I gave up that idea and cleared the AMP installations along with egroupware. Because I still needed a webserver to allow the slug to act as my local apt-mirror I then installed lighttpd which is flexible enough to offer name based virtual web servers. The slug now mirrors my preferred distro’s packages overnight and offers them to my internal machines as and when I want. This saves me either running a much larger, more power hungry machine as mirror or putting up with multiple fetches of the same software. Now even an apt-get dist-upgrade is fast.
The second main job of the slug is to act as Linksys originally intended – as network attached store for my internal machines. I don’t like samba (and with no windows machines on my network I don’t need it) and NFS is way over the top and potentially insecure (portmap anyone?) so I decided to stick to rsync over ssh. Now my internal machines run cron jobs to auto copy the files I care most about to the slug. I also have an ssh connection icon on my desktop which allows me to copy files to/from the slug independently of the rsync operation.
Serious stuff out of the way and working I decided to see if I could get a webcam operational. Plugging my Logitech (a Quickcam Communicate STX) in to port 2 and running lsusb proved that the camera was recognised, but there was no driver module and no /dev/video. That particular camera uses the spca5xx driver which has now apparently been superceded by the gspca module. Debian gives you the very useful “module assistant” package to help you through installing new kernel modules so first step was to install m-a itself. Next step, run “m-a” and “m-a prepare” to get the name of the required kernel-headers package for the running kernel and install it. This step should also have created the necessary /usr/src/linux symlink and installed the build-essential package to give me the compiler environment I needed for the package. But it failed – largely because my installed kernel was out of date (2.6.22-3 when the current version in the repository was 2.6.24-1). So I ran apt-get update then apt-get dist-upgrade to bring my slug up to date. Next step was to install the new module so I ran “m-a auto-install gspca”. This step gets the relevant module source(s), runs prepare and builds the module for you. Final step – modprobe gspca, plug in the camera and check that the v4l video system is running and /dev/video0 has been created. Bingo. Now add gspca to /etc/modules to ensure it gets loaded at boot. Running lsmod at this stage showed the snd modules loaded again despite the soundcore module being blacklisted. It turned out of course that gspca loads snd-usb-audio which in turn then loads the rest of the modules I thought I had already blacklisted. I cured this by specifically blacklisting the snd-usb-audio module.
So, I now had a working webcam and simply needed a command line application to get it running. The heavyweight webcam application is “motion” by Jeroen Vreeken. But it is “seriously” heavyweight and feature packed. I chose instead the much smaller and simpler “webcam” by Gerd Knorr. I have configured it to create a 320 * 240 jpeg snapshot every 5 seconds. You can see the results here.
Where next? Well given that I am running a pretty standard Debian installation, in theory I could run any application supported by that OS. The only limiting factor will be the hardware itself. Storage is no problem, the limits are in the CPU and memory. Now if Linksys could only be convinced to build a new version with say 128Mb of SDRAM and the 533 MHz processor at a reasonable price I’d guess they would have a lot of happy customers.
My obvious next step is to invest in one or two more slugs. I can see me using one as a squid proxy and I’d like to experiment with Lighttpd, PHP and SqlLite just to see if I can get a groupware application running at a usable speed. I’m not sure I can get joomla running though.