
I have been making some changes to my domestic network of late which I will write about later. However, one of the main changes has been an upgrade from 10/100 switches to gigabit – mainly to improve throughput between my central filestore and desktop machines. For cosmetic reasons (and to keep my wife happy) I try to avoid having cat 5 cables strung around the place and most of them are hidden behind bookcases, furniture or soft furnishings. Lengthier cabling between my study (which houses the routers) and other rooms is catered for either by wifi or by ethernet over powerline. Both of these, of course, run at much lower speeds than even my existing 10/100 cabling so they remained unchanged.
However, my main machines are all housed in the one room (my study) and it was here that I wanted to improve file transfer speeds. I was therefore more than a little disappointed (and puzzled) to find that replacing my old 10/100 Mbps Netgear 8 port switch with a TP-Link Gigabit switch made no difference whatsoever. At first I was inclined to blame myself for buying a TP-Link device when I had previously had a poor experience with their products, but realistically I could not believe that performance should be that bad. The best connection speed I saw in a straight file transfer over FTP between my new file server and my desktop was 9 MB/s. Now a gigabit switch has a theoretical throughput of 125 MB/sec – call it 95-100 MB/sec after allowing for overheads and transmission inefficiencies. But 9 MB/s? Hell that is way too low and looks more like the rate I would expect to see on a 100 Mbps connection.
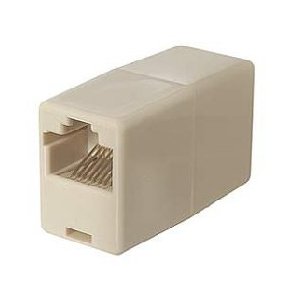
After some head scratching I decided to pull out all the cabling between the two machines in question and the new switch. I found something I had forgotten was there – a CAT 5 RJ45 connector joining two separate lengths of cable into one. I had used that some long time ago when the cable run between my desktop and the old switch wasn’t long enough to stretch the full distance. By re-siting the switch (which because of my architectural changes no longer needed to be sited so far away) I could remove the junction and simply use two clean cable runs between the switch and the desktop and server. Bingo 89-92 MB/s throughput.
The offending object (below) has been consigned to the bin. But I confess to being puzzled as to why a single dumb connector should have had such an adverse impact over such a comparatively short cable run.
3 comments
Did the offending coupler have all pins connected? 10/100Mbit use two pairs, 1Gig uses all four.
It is also possible that the coupler was crossing wires (to turn two straight cables into a crossover cable) and that caused Auto-MDIX to fail. This seems less likely though.
Author
David
Smart man. Answer is I don’t know. The coupler is a sealed (grey) “black box”. I assumed that all 8 pins were wired straight through, but without dismantling it, or testing with a LAN tester of some kind I can’t tell and I can’t be arsed to fiddle about with tiny probe wires attached to a multimeter. I must have had the thing for nigh on 12-15 years though so it is not impossible that only 2 pairs are continuous – though that strikes me as unlikely.
Cheers
Mick
Mick, here is a tip for you which I have been using since 1990 or so.
Go to https://rswww.com and look up Beta Ducts, RS part numbers 599-027 and 599-055. Those are open slot, 50x50mm cable trunks with a separate lid. I personally prefer the 2m lengths, I guess you’re better off with a pack of 1m lenghts unless you can sell part of that bigger pack to others (or consider it a lifelong supply :) ). There are other sizes, but I found the 50×50 to be the best balance between stability and space.
You will have to go through the pain of unplugging everything once to untangle it all if you want to do it right (you can leave out that part, but it means more work). Drop one of more lengths (depending on need) on the floor behind where you have your cable problem, or even screw them underneath the table, then start looping the cable in. I guess officially one should separate power and network, but it’s generally OK for domestic use. Once you have the cable looped in (long cables run back & forth for a bit), close the lid. I personally cut a lid in 2..3 pieces because it’s easier doing it bit by bit. I tend to also mount some power blocks nearby so it’s all together.
You end up with a long black bar which hides all your cabling. It’s neat (the eye likes straight lines, and dark tends to visually disappear), and if you want to change or add something you just take the lid off and do what needs doing.
To illustrate how good this works, where I used to live I actually had a fully transparent glass working table (I needed a Logitech Anywhere MX mouse for that). It held a monitor with two inputs and power, an 8 port powered USB hub which was half occupied, the remote volume control of my speakers, a desk light, a phone and power/screen/network/USB connections for my laptop. Despite that, no cable mess was visible whatsoever.
Cable messes are my pet hate, and this technique has worked for me for years. Your wife will probably love it too, because it then looks neat and is easy to keep that way. BTW, if you have anything you change frequently, consider using a separate box, or loop that in last, otherwise you will eventually have to reorganise things again.
Regards, Peter